Quantcast
Channel: stm32 – Freedom Embedded
Viewing all 21 articles
Browse latest View live

ARM Cortex-M3 boards with STM32 chip

$
0
0

The ARM Cortex-M3 is the baseline of ARM 32-bits microcontrollers. Many products spawn from its design: the Cortex-M0 (a stripped-down version for small systems), the Cortex-M1 (specifically designed to be implemented in FPGA) and the Cortex-M4 (with Digital Signal Processing extensions).

One chip family that contains the Cortex-M3 is the STM32. STMicroelectronics recently introduced the Discovery Kit: a very low cost evaluation board that can be easily connected to custom electronics. The processor is a 24MHz Cortex-M3 and the peripherals include many standard low-speed ports such as UART, I2C and SPI, and plenty of GPIOs. The development tools that are ready to be used for this platform are Atollic TrueStudio (Lite is free), IAR Embedded Workbench and Keil development kit.

Another low-cost board that contains the STM32 is the Maple. It sports a 72MHz processor and many peripherals. The board design is open source, as well as the development environment, that is derived from the Arduino IDE. Make Magazine wrote some thoughts on it, comparing it with Arduino, while LeafLabs already produced an application that implements audio effects.


Filed under: Hardware Tagged: arduino, ARM, atollic, cortex-m3, iar, keil, leaflabs, make, maple, st, stm32, stmicroelectronics, truestudio

Olimex STM32-P152 board arrived

$
0
0

Last week I placed an order for some electronic products, and they arrived yesterday.

Olimex STM32-P152 board, FTDI MPSSE USB cables, FTDI Chipi-X10 USB-RS232 converter

Olimex STM32-P152 board, FTDI MPSSE USB cables, FTDI Chipi-X10 USB-RS232 converter

The main products in the shipment are:

One of the reasons why I bought the Olimex board is because I wanted to test my JTAGduino code on something. JTAGduino is my attempt to transform an Arduino into a JTAG dongle, in order to be able to program and debug various microcontrollers and FPGAs.

I bought the C232HM spaghetti cable (based on the FT232H chip) because it appears to me one of the cheapest ways to obtain a JTAG emulator, with one practical disadvantage of connecting the wires one by one to the right pins (I hope this works out, it seems like recently spaghetti is a word associated with catastrophic failure). My first goal is to connect the STM32 to the PC using these cables, and program/debug it using openocd.

Stay tuned.


Filed under: Hardware Tagged: arduino, ARM, ftdi, jtag, jtagduino, olimex, openocd, rs232, stm32, stmicroelectronics, usart, usb

JTAG connection with OpenOCD and FTDI cable

$
0
0

Some time ago I bought several electronic parts to play with. One of these products is the FTDI C232HM-EDHSL-0, which is a USB-to-spaghetti dongle that connects a PC to an embedded product using many protocols (USART, SPI, I2C, JTAG, …).

FTDI C232HM cable

FTDI C232HM cable

In particular, JTAG is a kind of connection that is commonly used to test and debug integrated circuits. My goal is to use this cable to create a JTAG connection between my PC and an electronic board, as shown in the following image.

JTAG connection with C232HM

JTAG connection with C232HM

In order to perform this connection, I needed the following equipment:

  • A JTAG adapter: in my case the C232HM
  • A “Device Under Test”, in other words an integrated circuit mounted on a board with JTAG connectors: in my case the Olimex STM32-P152
  • A PC with relevant software and drivers: in my case I have a Debian Linux box with OpenOCD 0.5.0 and FTDI libraries 0.20 (libftdi1 Debian package).

When I insert the C232HM USB plug into the PC, these are the messages I get from the kernel:

$ dmesg
...
[10909.856093] usb 5-2.1: new high-speed USB device number 7 using ehci-pci
[10909.952085] usb 5-2.1: New USB device found, idVendor=0403, idProduct=6014
[10909.952091] usb 5-2.1: New USB device strings: Mfr=1, Product=2, SerialNumber=3
[10909.952095] usb 5-2.1: Product: C232HM-EDHSL-0
[10909.952099] usb 5-2.1: Manufacturer: FTDI
[10909.952103] usb 5-2.1: SerialNumber: FTV9J8DR
[10910.018460] usbcore: registered new interface driver usbserial
[10910.018479] usbcore: registered new interface driver usbserial_generic
[10910.018492] usbserial: USB Serial support registered for generic
[10910.024490] usbcore: registered new interface driver ftdi_sio
[10910.024509] usbserial: USB Serial support registered for FTDI USB Serial Device
[10910.024589] ftdi_sio 5-2.1:1.0: FTDI USB Serial Device converter detected
[10910.024628] usb 5-2.1: Detected FT232H
[10910.024630] usb 5-2.1: Number of endpoints 2
[10910.024633] usb 5-2.1: Endpoint 1 MaxPacketSize 512
[10910.024636] usb 5-2.1: Endpoint 2 MaxPacketSize 512
[10910.024638] usb 5-2.1: Setting MaxPacketSize 512
[10910.024879] usb 5-2.1: FTDI USB Serial Device converter now attached to ttyUSB0

In order to connect to this device with OpenOCD, I need to write a configuration file (that I named “c232hm-edhsl-0.cfg“) and pass it to OpenOCD. The file contains:

interface ft2232
ft2232_layout usbjtag
ft2232_vid_pid 0x0403 0x6014
adapter_khz 1000

From OpenOCD user’s guide, these configurations are needed to connect with an FTDI chip.

The layout is a setting that tells OpenOCD how to manage the I/Os of the FTDI chip that are not the basic JTAG signals (TCK, TMS, TDI, TDO), in my case it doesn’t matter since I have no intention of using them.

From FT232H data sheet, the FTDI chip is able to sustain 30Mbps, which means a TCK clock frequency of 30MHz, but in our case I want to keep it as low as 1MHz (adapter_khz 1000) until I feel that the setup is stable enough.

When I run OpenOCD with this configuration, the result is:

$ openocd -f c232hm-edhsl-0.cfg
Open On-Chip Debugger 0.5.0 (2011-08-11-06:56)
Licensed under GNU GPL v2
For bug reports, read

http://openocd.berlios.de/doc/doxygen/bugs.html

Info : only one transport option; autoselect 'jtag'
1000 kHz
Error: unable to open ftdi device: inappropriate permissions on device!
in procedure 'init'

This error appears because the Linux service “udev” assigns access rights based on its rules when a device is plugged in, and these rules are restrictive by default, allowing access only to the administrator.

When OpenOCD is installed in a Debian system, a new udev rule file is created in “/lib/udev/rules.d/60-openocd.rules“. This file contains the following rules:

ACTION!="add|change", GOTO="openocd_rules_end"
SUBSYSTEM!="usb", GOTO="openocd_rules_end"
ENV{DEVTYPE}!="usb_device", GOTO="openocd_rules_end"

# Olimex ARM-USB-OCD
ATTRS{idVendor}=="15ba", ATTRS{idProduct}=="0003", MODE="664", GROUP="plugdev"

...

# Hilscher NXHX Boards
ATTRS{idVendor}=="0640", ATTRS{idProduct}=="0028", MODE="664", GROUP="plugdev"

LABEL="openocd_rules_end"

I remand to udev man pages for the rules syntax, but it is sufficient to say that I want my device to be accessible for plugdev group that my user is already a part of. In many Linux distributions the normal users are automatically added to plugdev group in order to be able to plug in a USB drive and access the file system inside it.

I added (as root) another rule near the end of the file, before the LABEL line:

...
# C232HM-EDHSL-0 FT232H Single HS USB-UART/FIFO IC
ATTRS{idVendor}=="0403", ATTRS{idProduct}=="6014", MODE="664", GROUP="plugdev"

LABEL="openocd_rules_end"

There is usually no need to tell udev to reload its rules, anyway the “udevadm control --reload-rules” command run as root should take care of that.

The OpenOCD output now becomes:

...
1000 kHz
Info : clock speed 1000 kHz
Warn : There are no enabled taps.  AUTO PROBING MIGHT NOT WORK!!
Error: JTAG scan chain interrogation failed: all ones
Error: Check JTAG interface, timings, target power, etc.
Error: Trying to use configured scan chain anyway...
Warn : Bypassing JTAG setup events due to errors
Warn : gdb services need one or more targets defined

This message means the FTDI chip tried to read from TDO some data, but the signal is stuck to a high level (all ones), and the reason is that I did not attach the pins to anything (up to now), and the pin has probably a pull-up resistance that keeps it high when floating. The next step is to connect the C232HM to the board.

The Olimex P152 board user manual indicates that the board has a common 20-pin JTAG connector (whose pinout is easily available on the web). I need to connect TCK, TMS, TDI and TDO that are the basic JTAG signals, and GND to give a common voltage reference. From C232HM data sheet I can get the mapping of the colored wires to their functions. By crossing the information I get:

  • TCK: orange wire on pin 9 of the JTAG 20-pin connector
  • TMS: brown wire on pin 7
  • TDI: yellow wire on pin 5
  • TDO: green wire on pin 13
  • GND: black wire on any one of pins 4,6,8,10,12,14,16,18,20

The resulting connection is shown in the image.

JTAG wiring between STM32-P152 and C232HM

JTAG wiring between STM32-P152 and C232HM

I then power up the board (by connecting it to the PC with an USB cable) and run OpenOCD again. This time the output is:

...
Warn : There are no enabled taps. AUTO PROBING MIGHT NOT WORK!!</pre>
Warn : AUTO auto0.tap - use "jtag newtap auto0 tap -expected-id 0x4ba00477 ..."
Warn : AUTO auto1.tap - use "jtag newtap auto1 tap -expected-id 0x06416041 ..."
Warn : AUTO auto0.tap - use "... -irlen 4"
Warn : AUTO auto1.tap - use "... -irlen 5"
Warn : gdb services need one or more targets defined

This output means that OpenOCD is trying to scan the JTAG chain for TAPs, and its automatic procedure is finding two taps: one with ID code 0x4ba00477 and Instruction Register length of 4 bits, and one with ID code 0x06416041 and Instruction Register length of 5 bits. I verified in the STM32L152 user manual that these are indeed the ID codes of the two taps present inside the chip, which means OpenOCD is reading the correct values through FTDI chip and so the board is connected properly.

My next step is to connect with the Cortex-M3 core that runs inside the STM32 chip, using a GDB debugger and OpenOCD. Stay tuned.


Filed under: Embedded Tagged: c232hm, debian, ftdi, jtag, libftdi, linux, olimex, openocd, scan chain, stm32, stmicroelectronics, udev, usb

Flashing the STM32-P152 board with OpenOCD

$
0
0

These days I am playing with the Olimex STM32-P152 board, trying to make it work and make it run some software. The STM32L152 on board has an embedded flash that can be programmed, so that when the chip is powered up the microcontroller will execute it right away, and I’m going to try that.

Olimex STM32-P152

Olimex STM32-P152

The steps involved are:

  1. Requirements: Installation of needed software and hardware setup
  2. Development: writing and compiling a simple program
  3. Deployment: writing the program into the embedded flash

Requirements

The things I need to complete my objective are (apart from the Olimex board):

The version of OpenOCD must be at least 0.6.0 because it’s the first version to support STM32L flash programming, older versions won’t work. In my case I have Debian testing where the packaged OpenOCD is version 0.5.0, so I had to install the package from Debian unstable (I used this method to install it), which is version 0.7.0. It’s also possible to compile and install OpenOCD >= 0.6.0 from source.

GCC ARM Embedded is a free toolchain that I find very useful, complete and easy to use for this kind of bare metal developing. I simply downloaded the Linux installation tarball from version 4.7-2013-q2, and extracted the content in “/opt” directory as root, with:

# cd /opt/
# tar xjf <download path>/gcc-arm-none-eabi-4_7-2013q2-20130614-linux.tar.bz2

The “readme.txt” file (in my case it was extracted in directory “/opt/gcc-arm-none-eabi-4_7-2013q2/share/doc/gcc-arm-none-eabi/“) contains the essential information to start developing with the toolchain. As written in the documentation, I appended the directory to the path, by adding at the end of “~/.bashrc” the lines:

PATH="/opt/gcc-arm-none-eabi-4_7-2013q2/bin/:${PATH}"
export PATH

About the JTAG connection, I’m using the same setup that I put in place in the post “JTAG connection with OpenOCD and FTDI cable“, so refer to that for hardware connection and how to change udev rules to allow normal users the access to C232HM.

Development

I wanted to run a simple program that makes a LED blink. The STM32-P152 board has many LEDs, and looking at the user manual the STAT3 and STAT4 LEDs are the simplest to use because they have just a resistor between the LED and 3.3V; in this configuration, I need to drive the signal to ground to turn on the LED, and to 3.3V (or to high impedance) to turn off the LED. I choose STAT4, that is connected to pin PE11 of the STM32L152, which means the Port E, I/O number 11. Using the reference manual and datasheet from the documentation page of the product, I wrote this “blink.c” file:

#include <stdint.h>

#define REG32(addr) (*(volatile uint32_t *)(addr))

#define GPIOE_BASE   0x40021000
#define GPIOE_MODER  REG32(GPIOE_BASE + 0x00)
#define GPIOE_OTYPER REG32(GPIOE_BASE + 0x04)
#define GPIOE_ODR    REG32(GPIOE_BASE + 0x14)

#define RCC_BASE 0x40023800
#define RCC_AHBENR REG32(RCC_BASE + 0x1C)
#define RCC_AHBENR_GPIOEEN 0x10

#define STAT4_PIN 11
#define STAT4_PIN_MASK (1UL<<STAT4_PIN)

static
void delay(int nops)
{
    while(nops > 0)
    {
        asm ("nop");
        nops--;
    }
}

static
void set_gpioe_moder(int pin, int mode)
{
    uint32_t moder;
    uint32_t moder_pin_pos;
    uint32_t moder_pin_mask;

    moder_pin_pos = pin*2; // 2 bits per pin
    moder_pin_mask = 0x3UL << moder_pin_pos;

    moder = GPIOE_MODER; // read from register
    moder &= ~moder_pin_mask; // clear moder pin field
    moder |= (mode << moder_pin_pos); // set moder pin field
    GPIOE_MODER = moder; // write to register
}

void main(void)
{
    RCC_AHBENR |= RCC_AHBENR_GPIOEEN; // enable GPIOE clock
    GPIOE_OTYPER |= STAT4_PIN_MASK; // open-drain
    set_gpioe_moder(STAT4_PIN, 1); // general purpose output
    while(1)
    {
        GPIOE_ODR |= STAT4_PIN_MASK; // output pin low -> LED ON
        delay(100000);
        GPIOE_ODR &= ~STAT4_PIN_MASK; // output pin high-z -> LED OFF
        delay(100000);
    }
}

void SystemInit(void)
{
    return;
}

void _exit(int code)
{
    while(1);
}

A couple of notes:

  • I am using General Purpose Input/Output (GPIO) functionality to drive PE11.
  • Before using GPIO registers, I need to enable the peripheral’s clock using the Reset and Clock Controller (RCC) registers.
  • I configure PE11 as “open drain” so that when the pin is driven low the current passes through the LED into the pin, and when the pin is high it’s actually in high impedance and there’s no current flowing.
  • SystemInit and _exit functions are there because they are used in the GCC ARM toolchain startup code. If they don’t exist the linker complains about undefined references.

For bare metal programming, I also need startup code and linker scripts. These are conveniently prepared by the developers of the GCC ARM toolchain inside the samples directory. So I copied the “/opt/gcc-arm-none-eabi-4_7-2013q2/share/gcc-arm-none-eabi/samples/startup/startup_ARMCM3.S” and  ”/opt/gcc-arm-none-eabi-4_7-2013q2/share/gcc-arm-none-eabi/samples/ldscripts/sections.ld” files into the build directory, and created the following “stm32l152.ld” linker script for memory layout (taken from STM32L152 datasheet):

MEMORY
{
  FLASH (rx) : ORIGIN = 0x08000000, LENGTH = 0x00020000
  RAM  (rwx) : ORIGIN = 0x20000000, LENGTH = 0x00004000
}

I now have everything to build the program and generate a binary image to write in flash:

$ arm-none-eabi-gcc    -mthumb -mcpu=cortex-m3 -c -o blink.o blink.c
$ arm-none-eabi-gcc     -c -o startup_ARMCM3.o startup_ARMCM3.S
$ arm-none-eabi-gcc -Tstm32l152.ld -Tsections.ld -mthumb -mcpu=cortex-m3 blink.o startup_ARMCM3.o    -o blink
$ arm-none-eabi-objcopy -O binary blink blink.bin

The “-mthumb -mcpu=cortex-m3” options are taken from the toolchain “readme.txt“. The linker default behavior is to create a static executable, so the “-static” option is not necessary.

The final output of the build command is the “blink.bin” image that is ready to be be flashed into the chip.

Deployment

In order to write the flash, we need to connect to the board with OpenOCD and use its “flash write_image” command.

Since I’m using the C232HM FTDI cable, I use the “c232hm-edhsl-0.cfg” configuration file from last post. Then I need a configuration file for the STM32L152 chip, thankfully prepared by the Olimex developers on their website; I save the file as “stm32l.cfg“. Then I prepare another file, that I call “flash_blink.cfg“, containing the commands to run:

init
reset init
halt
flash write_image erase blink.bin 0x08000000
shutdown

The “reset init” command is needed to make the chip run at high speed, because when it powers up by default it uses its slow clock. The code that takes care of this is inside the “stm32l.cfg” file.

The Olimex STM32-P152 board comes pre-loaded with a demo software that blinks LEDs, uses the display and so on, but it doesn’t allow JTAG connection, probably because it uses the JTAG pins as other functionalities. The board has two jumpers that control the boot mode of the STM32L152, they are B0_1/B0_0 and B1_1/B1_0. If these jumpers are closed in B0_1 and B1_1 positions, the chip boots from SRAM, which contains random data at startup. When this happens, usually the chip stops immediately with an exception and the debugger is free to take control.

Be aware that the following procedure overwrites the content of the embedded flash. If you want to save the content of the flash you can do so using the OpenOCD command “dump_image“.

I configure the boot pin in SRAM boot mode, connect to the FTDI cable, power up the board and run the command to write in flash:

$ openocd -f c232hm-edhsl-0.cfg -f stm32l.cfg -f flash_blink.cfg
Open On-Chip Debugger 0.7.0 (2013-08-04-10:13)
Licensed under GNU GPL v2
For bug reports, read

http://openocd.sourceforge.net/doc/doxygen/bugs.html

Info : only one transport option; autoselect 'jtag'
adapter speed: 1000 kHz
adapter speed: 100 kHz
adapter_nsrst_delay: 100
jtag_ntrst_delay: 100
Warn : target name is deprecated use: 'cortex_m'
DEPRECATED! use 'cortex_m' not 'cortex_m3'
cortex_m3 reset_config sysresetreq
Info : max TCK change to: 30000 kHz
Info : clock speed 100 kHz
Info : JTAG tap: stm32l.cpu tap/device found: 0x4ba00477 (mfg: 0x23b, part: 0xba00, ver: 0x4)
Info : JTAG tap: stm32l.bs tap/device found: 0x06416041 (mfg: 0x020, part: 0x6416, ver: 0x0)
Info : stm32l.cpu: hardware has 6 breakpoints, 4 watchpoints
Error: stm32l.cpu -- clearing lockup after double fault
Polling target stm32l.cpu failed, GDB will be halted. Polling again in 100ms
Polling target stm32l.cpu succeeded again
Info : JTAG tap: stm32l.cpu tap/device found: 0x4ba00477 (mfg: 0x23b, part: 0xba00, ver: 0x4)
Info : JTAG tap: stm32l.bs tap/device found: 0x06416041 (mfg: 0x020, part: 0x6416, ver: 0x0)
target state: halted
target halted due to debug-request, current mode: Thread
xPSR: 00000000 pc: 0x00010004 msp: 0xc842aeec
STM32L: Enabling HSI
adapter speed: 2000 kHz
auto erase enabled
STM32L flash size is 128kb, base address is 0x8000000
wrote 4096 bytes from file blink.bin in 0.513909s (7.783 KiB/s)
shutdown command invoked

The OpenOCD output contains the line “Error: stm32l.cpu -- clearing lockup after double fault“, and it’s precisely because when you boot from SRAM you can have unexpected behavior and the Cortex-M3 fires an exception. This procedure is not completely safe because the SRAM contains random data, and so it could contain something that by chance resembles code, but the probability of this happening is practically zero.

Then I change the boot jumpers to B0_0 B1_0 configuration (boot from flash) and reset the board, and the STAT4 LED starts blinking as a sign that the program is being run.

Conclusions

So the Olimex board is now loaded with a custom program that runs when the chip is powered on. We used just free software to do it and we did it at a very low level, without graphical environments, exploiting the functionalities of the ARM toolchain and OpenOCD.

The program is about 3KiB of size, which is a lot considering that it does practically nothing. The GCC ARM toolchain has the options to use a reduced libc (newlib nano) and it is also possible to exclude C++ support to reduce the C Run-Time beyond that.

In order to troubleshoot the procedure, the best way is to retrieve more information and analyse it, for example:

  • Generate a map file adding “-Xlinker -Map=blink.map” option to the linking phase,
  • Generate a disassembled list of the program with “arm-none-eabi-objdump -S blink“,
  • Increase OpenOCD debug information with “-d” option,
  • Connect to OpenOCD through “telnet localhost 4444” and analyse the chip state with “mdw” and “dump_image” commands.

Next time I will use GDB to debug the program by attaching to OpenOCD built-in GDB server.


Filed under: Embedded Tagged: ARM, arm-none-eabi, arm-none-eabi-gcc, bare metal, c232hm, cortex-m3, debugging, flash, ftdi, gcc, gpio, jtag, linker script, microcontroller, olimex, openocd, stm32, stm32-p152, stmicroelectronics

Debugging the STM32-P152 board with GDB

$
0
0

I am still playing with my Olimex STM32-P152 board: after connecting to its JTAG port with an FTDI cable and flashing it with OpenOCD, I wanted to debug a running program with GDB.

Olimex STM32-P152

Olimex STM32-P152

The steps involved are:

  1. Requirements: Installation of needed software and hardware setup.
  2. Flashing: Building a simple program and writing it into the embedded flash.
  3. Debugging: Attaching to the running program.

Requirements

The things I need to complete my objective are (apart from the Olimex board):

Since the requirements are the same as the last posts, we should refer to them to set up the environment. In summary the steps are:

Flashing

The building and flashing of a program is similar to the Flashing the STM32-P152 board with OpenOCD post, with a couple of differences:

  • Configure system to use the high speed clock.
  • Add debug flags to compilation.

About the high speed clock, the STM32L152 starts with a slow clock, but has an internal clock that has a higher frequency. I noticed that the debug interface is more stable when using the high speed clock, so I wanted the program to configure it on startup. I took the “stm32l.cfg” file from Olimex website and wrote the same registers to switch to HSI clock inside the SystemInit function of the “blink.c” program that I created in Flashing the STM32-P152 board with OpenOCD, as follows:

...

#define RCC_CR REG32(RCC_BASE + 0x00)
#define RCC_CR_HSION 0x1
#define RCC_CR_HSIRDY 0x2
#define RCC_CFGR REG32(RCC_BASE + 0x08)
#define RCC_CFGR_SW 0x3
#define RCC_CFGR_SW_HSI 0x1

void SystemInit(void)
{
    uint32_t cfgr;

    RCC_CR |= RCC_CR_HSION; // Enable High Speed Internal clock
    while(!(RCC_CR & RCC_CR_HSIRDY)) // Wait for HSI ready
    {
        delay(10);
    }
    cfgr = RCC_CFGR;
    cfgr &= ~RCC_CFGR_SW;
    cfgr |= RCC_CFGR_SW_HSI; // Select HSI as system clock
    RCC_CFGR = cfgr;
    while((RCC_CFGR & RCC_CFGR_SW) != RCC_CFGR_SW_HSI) // Wait for HSI as system clock
    {
        delay(10);
    }
}

...

About the debug flags, it’s simply a matter of adding the “-g” option to GCC invocations, both in compiling and linking.

To summarize, the steps are:

  1. Copy the startup code “startup_ARMCM3.S“ from ARM GCC toolchain directories as explained in Flashing the STM32-P152 board with OpenOCD.
  2. Copy the linker script ”sections.ld” from ARM GCC toolchain directories as explained in Flashing the STM32-P152 board with OpenOCD.
  3. Create the main program “blink.c” starting from Flashing the STM32-P152 board with OpenOCD and modifying SystemInit as written above.
  4. Create the linker script “stm32l152.ld” as explained in Flashing the STM32-P152 board with OpenOCD.
  5. Write the OpenOCD configuration file ”c232hm-edhsl-0.cfg” for the JTAG adapter as in JTAG connection with OpenOCD and FTDI cable.
  6. Copy the OpenOCD configuration file “stm32l.cfg“ for STM32L152 from Olimex website.
  7. Write the OpenOCD script “flash_blink.cfg“ as explained in Flashing the STM32-P152 board with OpenOCD.
  8. Compile the program and flash it with the following commands:
$ arm-none-eabi-gcc -g -mthumb -mcpu=cortex-m3 -c -o blink.o blink.c
$ arm-none-eabi-gcc -g -c -o startup_ARMCM3.o startup_ARMCM3.S
$ arm-none-eabi-gcc -g -Tstm32l152.ld -Tsections.ld -mthumb -mcpu=cortex-m3 blink.o startup_ARMCM3.o    -o blink
$ arm-none-eabi-objcopy -O binary blink blink.bin
$ openocd -f c232hm-edhsl-0.cfg -f stm32l.cfg -f flash_blink.cfg

On the next boot from flash (a power-up or reset with boot jumpers placed in B0_0 B1_0 configuration) the STAT4 LED will start blinking at high speed.

Note that the blink executable is the file that we need to debug the program, and it’s important that the flashed program is the same as the one we use for debugging.

Debugging

Thankfully OpenOCD offers a GDB server, so that a debugger can connect to the target through it. By default OpenOCD opens a TCP/IP listening socket at port 3333, but OpenOCD manual alternatively suggest using pipes to connect. I wrote a configuration file, called “gdb-pipe.cfg“, with the following content:

gdb_port pipe
log_output openocd.log

$_TARGETNAME configure -event gdb-detach {
 echo "Debugger detaching: resuming execution."
 resume
}

The last lines register to the event where GDB is detached from OpenOCD and resume execution, so that when the user exits from GDB, the program continues to run and the LED starts blinking again.

For the debugger side, I prepared the following script of GDB commands, that I called “attach.cfg“:

target remote | openocd -f c232hm-edhsl-0.cfg -f stm32l.cfg -f gdb-pipe.cfg
monitor halt
monitor gdb_sync
stepi

The script executes OpenOCD and connects to it using a pipe, then halts the target and synchronizes with the GDB server. Note that the “monitor” commands are passed to OpenOCD directly. Now we can attach to the blink program:

$ arm-none-eabi-gdb blink -x attach.gdb
GNU gdb (GNU Tools for ARM Embedded Processors) 7.4.1.20130613-cvs
Copyright (C) 2012 Free Software Foundation, Inc.
License GPLv3+: GNU GPL version 3 or later <http://gnu.org/licenses/gpl.html>
This is free software: you are free to change and redistribute it.
There is NO WARRANTY, to the extent permitted by law.  Type "show copying"
and "show warranty" for details.
This GDB was configured as "--host=i686-linux-gnu --target=arm-none-eabi".
For bug reporting instructions, please see:
<http://www.gnu.org/software/gdb/bugs/>...
Reading symbols from /home/francesco/Projects/olimex-p152/blink/blink...done.
Open On-Chip Debugger 0.7.0 (2013-08-04-10:13)
Licensed under GNU GPL v2
For bug reports, read

http://openocd.sourceforge.net/doc/doxygen/bugs.html

Info : only one transport option; autoselect 'jtag'
adapter speed: 1000 kHz
adapter speed: 100 kHz
adapter_nsrst_delay: 100
jtag_ntrst_delay: 100
Warn : target name is deprecated use: 'cortex_m'
DEPRECATED! use 'cortex_m' not 'cortex_m3'
cortex_m3 reset_config sysresetreq
0x00000000 in ?? ()
target state: halted
target halted due to debug-request, current mode: Thread
xPSR: 0x21000000 pc: 0x08000116 msp: 0x20003fe8
stepi ignored. GDB will now fetch the register state from the target.

Program received signal SIGINT, Interrupt.
0x08000116 in delay (nops=27024) at blink.c:27
27	        nops--;
(gdb) list
22	void delay(int nops)
23	{
24	    while(nops > 0)
25	    {
26	        asm ("nop");
27	        nops--;
28	    }
29	}
30
31	static
(gdb) disassemble
Dump of assembler code for function delay:
   0x08000108 <+0>:	push	{r7}
   0x0800010a <+2>:	sub	sp, #12
   0x0800010c <+4>:	add	r7, sp, #0
   0x0800010e <+6>:	str	r0, [r7, #4]
   0x08000110 <+8>:	b.n	0x800011c <delay+20>
   0x08000112 <+10>:	nop
   0x08000114 <+12>:	ldr	r3, [r7, #4]
=> 0x08000116 <+14>:	add.w	r3, r3, #4294967295
   0x0800011a <+18>:	str	r3, [r7, #4]
   0x0800011c <+20>:	ldr	r3, [r7, #4]
   0x0800011e <+22>:	cmp	r3, #0
   0x08000120 <+24>:	bgt.n	0x8000112 <delay+10>
   0x08000122 <+26>:	add.w	r7, r7, #12
   0x08000126 <+30>:	mov	sp, r7
   0x08000128 <+32>:	pop	{r7}
   0x0800012a <+34>:	bx	lr
End of assembler dump.
(gdb) disconnect
Ending remote debugging.
(gdb) quit

So, the GDB command line client started and connected to the target, which was running in the delay function. It is possible to analyse the state and do the usual debugging. I also wanted to start debugging a program from the beginning, so I added a script called “run.gdb” that resets the core and breaks execution at main:

source attach.gdb
monitor reset halt
tbreak main
continue

The result when running the debugger with this script is that the target is reset, then a temporary breakpoint is set at the main function, then the program is resumed and eventually the execution stops at the beginning of main:

$ arm-none-eabi-gdb blink -x run.gdb
GNU gdb (GNU Tools for ARM Embedded Processors) 7.4.1.20130613-cvs
...
target state: halted
target halted due to debug-request, current mode: Thread
xPSR: 0x01000000 pc: 0x080002a8 msp: 0x20004000
Temporary breakpoint 1 at 0x800018c: file blink.c, line 49.
Note: automatically using hardware breakpoints for read-only addresses.

Temporary breakpoint 1, main () at blink.c:49
49	    RCC_AHBENR |= RCC_AHBENR_GPIOEEN; // enable GPIOE clock
(gdb)

It is also possible to use a graphical interface such as DDD, using for example:

$ ddd --debugger arm-none-eabi-gdb --command=run.gdb blink

And the result is shown in the following screenshot.

Debugging blink program running on STM32-P152 with DDD.

Debugging blink program running on STM32-P152 with DDD.

Conclusions

We have now a way to build and debug program for STM32-P152 at a very low level, using basic tools. I am aware that there are many integrated solutions using Eclipse or other IDEs, but I believe it’s important to know what’s happening below the surface, so that when problem arise, the developer can investigate the details and troubleshoot the situation very close to the hardware.


Filed under: Embedded Tagged: ARM, arm-none-eabi, arm-none-eabi-gcc, bare metal, c232hm, cortex-m3, ddd, debugging, flash, ftdi, gcc, gdb, gpio, jtag, linker script, microcontroller, olimex, openocd, stm32, stm32-p152, stmicroelectronics

Free Eclipse ARM GCC OpenOCD Toolchain for Windows |Ångstroms And Algorithms

$
0
0

This new blog called Ångstroms And Algorithms has a complete tutorial on developing and debugging for ARM microcontrollers on Windows. In particular he’s using a STM32-E407 board, an ARM-USB-TINY-H JTAG adapter, ARM GCC toolchain and Eclipse. The tutorial is divided in 4 parts:

Free Eclipse ARM GCC OpenOCD Toolchain for Windows

  1. Introduction
  2. ARM GCC
  3. Eclipse IDE
  4. GDB / OpenOCD Debugger

Personally I am not inclined to use Windows for embedded software development, or development in general, or anything else really, but I know there are many developers on Windows and this tutorial can be useful to them. Also, I tend to not use graphical IDEs for the build/debug environment, but I can see its usefulness especially to start out, and to develop complex projects where you can save a lot of time with IDE functionalities such as refactoring.

[via olimexBuilding an ARMGCC, Eclipse, OpenOCD toolchain for Windows tutorials]


Filed under: Embedded Tagged: ARM, arm-none-eabi-gcc, bare metal, debugging, eclipse, gcc, gdb, gnu, ide, jtag, microcontrollers, olimex, open source, open source hardware, openocd, stm32, stmicroelectronics, windows

STM32-P152 development with Eclipse on Linux

$
0
0

Some time ago I played with Olimex STM32-P152 board and wrote some posts about it:

I wanted to extend this setup by using an IDE, and I chose Eclipse because it seems to have the right plugins and resources. In particular I have been inspired by this post for developing on STM32F3Discovery on Mac OS X using Eclipse and this post for Windows. I suppose there are many alternatives that are probably simpler and lighter (Eclipse is quite large and complicated), but here’s what I did.

I am certain that the steps that I follow here can be modified to work with many other Cortex-M targets and many other JTAG adapters/emulators, so this guide can be useful to people who are developing on something different from the STM32-P152 and have a different cable than the C232HM-EDHSL-0.

Installation

I follow basically the same steps as the post mentioned above, so use that as a reference, but I have a few differences:

  1. OpenOCD: I have a Debian testing (jessie) PC so I simply ran as root “aptitude install openocd” and it installed version 0.7.0-2 of the tool.
  2. GCC ARM Embedded toolchain: I extracted GCC ARM Embedded 4.8-2013-q4-major (linux version) in /opt
  3. Eclipse: I installed Keplero for C/C++ Developers (Linux 32-bit version) in a subfolder of my home directory (once I had problem installing plugins by installing it in system folders)
  4. Eclipse plugins: I only installed  Eclipse CDT plugin and GCC ARM plugin, I did not need to install Zylin embedded CDT because recently they added OpenOCD debugging to GCC ARM plugin so I had everything I needed.

Create and build the program

Inside Eclipse, click File -> New -> C Project. Choose Project Type -> Executable -> Hello World ARM Cortex-M3 C Project -> Cross ARM GCC and give a name to the project. I gave it the name “blink-152” because I already had a program that blinked a LED and the program runs on STM32-P152 and it has no connection whatsoever with a certain rock band.

Choose Project Type -> Executable -> Hello World ARM Cortex-M3 C Project -> Cross ARM GCC.

Project creation

In next page, remove Linker semi-hosting options.

Remove Linker semi-hosting options.

C Project options.

Click Next until you reach the Toolchain option, and complete the path to the toolchain, in my case “/opt/gcc-arm-none-eabi-4_8-2013q4/bin“.

Complete the path to the toolchain.

Toolchain options.

A “Hello world” project will be created. It contains a main C file, the assembly code for startup and the linker scripts.

Hello world project.

Hello world project.

The STM32L152 has 128KiB of Flash and 16KiB of RAM, so I changed the “ldscripts/mem.ld” to reflect it:

MEMORY{
FLASH (rx) : ORIGIN = 0x08000000, LENGTH = 128K
 RAM (rwx) : ORIGIN = 0x20000000, LENGTH = 16K
}

Then I filled the “src/main.c” file with the program that I already created in previous posts:

#include <stdint.h>

#define REG32(addr) (*(volatile uint32_t *)(addr))

#define GPIOE_BASE   0x40021000
#define GPIOE_MODER  REG32(GPIOE_BASE + 0x00)
#define GPIOE_OTYPER REG32(GPIOE_BASE + 0x04)
#define GPIOE_ODR    REG32(GPIOE_BASE + 0x14)

#define STAT4_PIN 11
#define STAT4_PIN_MASK (1UL<<STAT4_PIN)

#define RCC_BASE 0x40023800
#define RCC_AHBENR REG32(RCC_BASE + 0x1C)
#define RCC_AHBENR_GPIOEEN 0x10
#define RCC_CR REG32(RCC_BASE + 0x00)
#define RCC_CR_HSION 0x1
#define RCC_CR_HSIRDY 0x2
#define RCC_CFGR REG32(RCC_BASE + 0x08)
#define RCC_CFGR_SW 0x3
#define RCC_CFGR_SW_HSI 0x1

static
void delay(int nops)
{
    while(nops > 0)
    {
        asm ("nop");
        nops--;
    }
}

static
void set_gpioe_moder(int pin, int mode)
{
    uint32_t moder;
    uint32_t moder_pin_pos;
    uint32_t moder_pin_mask;

    moder_pin_pos = pin*2; // 2 bits per pin
    moder_pin_mask = 0x3UL << moder_pin_pos;

    moder = GPIOE_MODER; // read from register
    moder &= ~moder_pin_mask; // clear moder pin field
    moder |= (mode << moder_pin_pos); // set moder pin field
    GPIOE_MODER = moder; // write to register
}

int main(void) {
    RCC_AHBENR |= RCC_AHBENR_GPIOEEN; // enable GPIOE clock
    GPIOE_OTYPER |= STAT4_PIN_MASK; // open-drain
    set_gpioe_moder(STAT4_PIN, 1); // general purpose output
    while(1)
    {
        GPIOE_ODR |= STAT4_PIN_MASK; // output pin high-z -> LED OFF
        delay(1000000);
        GPIOE_ODR &= ~STAT4_PIN_MASK; // output pin low -> LED ON
        delay(1000000);
    }
}

void SystemInit(void)
{
    uint32_t cfgr;

    RCC_CR |= RCC_CR_HSION; // Enable High Speed Internal clock
    while(!(RCC_CR & RCC_CR_HSIRDY)) // Wait for HSI ready
    {
        delay(10);
    }
    cfgr = RCC_CFGR;
    cfgr &= ~RCC_CFGR_SW;
    cfgr |= RCC_CFGR_SW_HSI; // Select HSI as system clock
    RCC_CFGR = cfgr;
    while((RCC_CFGR & RCC_CFGR_SW) != RCC_CFGR_SW_HSI) // Wait for HSI as system clock
    {
        delay(10);
    }
}

void _exit(int code)
{
    while(1);
}

I can finally run Project -> Build All (Ctrl-B) and the executable “Debug/blink-152.elf” is created.

Write in flash

In order to write the program in flash like I did last time, I wanted a raw binary image of the executable. The project by default creates an Intel HEX image in “Debug/blink-152.hex”, so I changed that option by going in Project -> Properties, then choosing C/C++ Build -> Settings, then under Cross ARM GNU Create Flash Image -> General I changed the Output file format to Raw Binary. On next build (Ctrl-B) Eclipse will create “Debug/blink-152.bin”.

Project properties -> C/C++ Build -> Settings -> Cross ARM GNU Create Flash Image -> General -> Output file format: Raw Binary

Generate raw binary image.

This image will be written in flash by OpenOCD, but we need the configuration files for it. I created a new folder “blink-152/openocd” in Eclipse to contain them, and then I created inside it the file “c232hm-edhsl-0.cfg” containing:

interface ft2232
ft2232_layout usbjtag
ft2232_vid_pid 0x0403 0x6014
adapter_khz 1000

I downloaded “stm32l.cfg” from Olimex website into “blink-152/openocd” folder, and then I created a last file called “flash_blink.cfg“:

init
reset init
halt
flash write_image erase Debug/blink-152.bin 0x08000000
shutdown

Now I have all the files I need.

A crucial point is to connect the board, and I repeated exactly the same passages as in this post:

  • TCK: orange wire on pin 9 of the JTAG 20-pin connector
  • TMS: brown wire on pin 7
  • TDI: yellow wire on pin 5
  • TDO: green wire on pin 13
  • GND: black wire on any one of pins 4,6,8,10,12,14,16,18,20

Then I set the board jumpers to B0_1 and B1_1 positions to make STM32 boot from RAM.

Now I created a new external tool that takes care of flashing by calling OpenOCD:

  1. Click Run -> External Tools -> External Tools Configuration…
  2. Click Program -> New
  3. Put in Name: Flash Program
  4. Put in Location: /usr/bin/openocd
  5. Put in Working Directory: ${workspace_loc:/blink-152}
  6. Put in Arguments: -f ${workspace_loc:/blink-152/openocd}/c232hm-edhsl-0.cfg -f ${workspace_loc:/blink-152/openocd}/stm32l.cfg -f ${workspace_loc:/blink-152/openocd}/flash_blink.cfg
Click Run -> External Tools -> External Tools Configuration... Click Program -> New Put in Name: Flash Program Put in Location: /usr/bin/openocd Put in Working Directory: ${workspace_loc:/blink-152} Put in Arguments: -f ${workspace_loc:/blink-152/openocd}/c232hm-edhsl-0.cfg -f ${workspace_loc:/blink-152/openocd}/stm32l.cfg -f ${workspace_loc:/blink-152/openocd}/flash_blink.cfg

Flash with OpenOCD

Clicking Run will launch OpenOCD and in the Console below the log will display the job done, ending with:

...
Info : STM32L flash size is 128kb, base address is 0x8000000
wrote 4096 bytes from file Debug/blink-152.bin in 0.526960s (7.591 KiB/s)
shutdown command invoked

By re-configuring the jumpers in B0_0 and B1_0 positions and pressing the reset button the board should start to blink STAT4 LED.

Attach debugger

It’s also possible to attach Eclipse debugger to the board and see the program execution and the internal state of the core.

  1. Click Run -> Debug configurations
  2. Add new GDB OpenOCD Debugging
  3. Go to Debugger tab
  4. Put in Executable: /usr/bin/openocd
  5. Put in Other options: -f ${workspace_loc:/blink-152/openocd}/c232hm-edhsl-0.cfg -f ${workspace_loc:/blink-152/openocd}/stm32l.cfg
  6. Tick option Connect to running target
Click Run -> Debug configurations Add new GDB OpenOCD Debugging Go to Debugger tab Put in Executable: /usr/bin/openocd Put in Other options: -f ${workspace_loc:/blink-152/openocd}/c232hm-edhsl-0.cfg -f ${workspace_loc:/blink-152/openocd}/stm32l.cfg Tick Option Connect to running target

Debugger options.

Be aware that when you debug you have to make sure that the board is flashed with the same executable that you are debugging. Click Debug and the Eclipse Debug Perspective opens. The program is still running so you need to click the “suspend” button to pause the execution and examine the state.

Eclipse Debug Perspective

Eclipse Debug Perspective

The “Reset target and restart debugging” button can also be used to run the program from the beginning. Be aware that when you disconnect from the target it will remain in a paused state and you need to reset the board to make it run again.

Conclusions

In this post I showed how to use Eclipse to create a simple “blink” program, flash it on a STM32-P152 board and attach to it with a debugger. This has been possible with the help of Eclipse plugins, GCC ARM Embedded toolchain, OpenOCD, C232HM FTDI JTAG cable. This approach can be adapted to many Cortex-M targets and many JTAG adapters mainly by changing access to hardware registers, changing the linker script memory map, and OpenOCD configuration files.


Filed under: Embedded Tagged: ARM, arm-none-eabi, arm-none-eabi-gcc, bare metal, c232hm, cortex-m3, ddd, debian, debugging, eclipse, flash, ftdi, gcc, gdb, gpio, ide, jtag, linker script, linux, microcontroller, olimex, openocd, stm32, stm32-p152, stmicroelectronics

JTAGduino: JTAG connection using Arduino

$
0
0

One of my personal project ideas is JTAGduino: using Arduino as a JTAG adapter. I wrote a couple of posts about it, and today I managed to connect it to a real target. All the code that I used here is present on my JTAGduino GitHub repository.

I have an Olimex STM32-P152 board, and I wanted to connect to its JTAG interface with my Arduino Uno. Warning: I had to be careful about the voltage of the signals: Arduino Uno has 5V I/O pins, while many other chips only support 3.3V. In my case the STM32L152 has 5V-tolerant pins, but according to the datasheet available in the product page the pins can sustain that voltage only if pull-up/pull-down resistors are disabled. Crossing the information from the user manual and the datasheet, the relevant I/O pins are: TMS: PA13, TCK: PA14, TDI: PA15, TDO: PB3. So it’s important (especially for prolonged use) to write in GPIOA_PUPDR and GPIOB_PUPDR the correspondent PUPDR fields to 0 in order to disable the resistors.

For the next step I wired the two boards together, connecting the 4 basic JTAG signals (TMS, TCK, TDI and TDO) and connecting the grounds together. The schematic of the Olimex board contains the information about where the signals are, while the pins to connect on the Arduino can be chosen according to the sketch you upload. In my sketch, I used pin 2 for TCK, pin 3 for TMS, pin 4 for TDI and pin 5 for TDO (array jtag_pin_map).

Arduino wired directly to target.

Arduino wired directly to target.

The Arduino sketch that I prepared allows to send JTAG sequences and receive the TDO readings through the default serial port; for example it’s possible to command JTAGduino from Python using pyserial. In order to see if the connection works I planned to read the device identification registers of the STM32L152. These registers are 32-bit codes that can be read from JTAG using particular sequences. The STM32L152 contains two TAP controllers, and each of them has one 32-bit code. The datasheet states that:

The TAP of the STM32L15xxx BSC (boundary scan) integrates a JTAG ID code equal to 0x06416041 0x4BA00477.

In order to read these values, one possibility hinted by IEEE 1149.1 specifications is to put the TAPs into Reset state and then scan out out the Data Register serially. This is done by exploiting the Finite State Machine in figure (figure that is also available in the doc directory of JTAGduino repository as a SVG Inkscape drawing or as a Graphviz dot file), that is common to all JTAG TAP controller that comply with IEEE. The state machine can be traversed using TMS values 0 and 1 that are sampled by the device at TCK rising edges. A good tutorial is available at fpga4fun.


JTAG TAP states

JTAG TAP states

To read two 32-bit ID codes, we can reach the Shift-DR state and then we shift out 64 bits from TDO. The implementation of a procedure to read the identifier codes is in read_idcodes.py script. The script can also detect the number of TAPs thanks to some rules of IEEE specs. Given that all ID codes are 32bit and that the least significant bit (the one shifted out first) is 1, we can shift into TDI the value 0, shift out 32bits and check if all 32bits are 0. If so, all the device identifier registers have been shifted out, otherwise we shift out other 32bits.

I ran the script from my Linux computer connected to Arduino through USB and it is able to detect the two TAPs and read the two 32-bit identification codes of the STM32L152. I suppose the same can be achieved in Windows by simply changing the name of the serial port.

From here, I can do something like adding to OpenOCD a driver for JTAGduino, so that I can debug the STM32L152 ARM Cortex-M3 core using the Arduino. I have to say that this experience made me more aware of the fact that a level shifter is needed to connect 5V logic to 3.3V targets. Also, some good JTAG cables and connectors would be preferable to those ugly wires.


Filed under: Hardware Tagged: arduino, debug, device identifier register, github, graphviz, idcode, inkscape, jtag, jtagduino, olimex, openocd, pyserial, python, stm32

ST Nucleo F103RB works with OpenOCD 0.8.0

$
0
0

Full disclosure: I work at ST Microelectronics, but what I write here is purely my opinion and my work, conceived and conducted in my spare time.
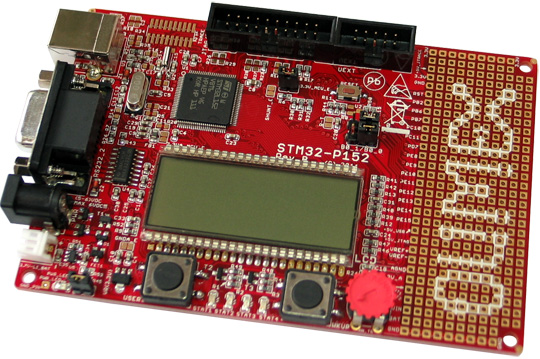
ST Nucleo-F103RB

ST Nucleo-F103RB

The ST Nucleo boards are development platforms mounting an STM32 microcontroller, made for the same enthusiasts that are attracted to Arduino and the like. They have between 64KiB and 512KiB of embedded Flash, up to 128KiB of RAM, up to around 100MHz of clock, ARM Cortex-M 32bit processor, an integrated programmer/debug adapter called ST-Link, Arduino-compatible connectors as well as a breakout pins that export all STM32 I/O, and their price is around 10$. Their intended development platform is ARM mbed, that allows to write code and build programs online, using a quite simple API that abstracts away many details of the platform, making it easy to start, and easy to share code and experience with the mbed community.

I have my hands on a Nucleo F103RB, that mounts an STM32F103RB microcontroller, and I wanted to try it on my Linux box. The first thing I did was plugging it in. The unusual thing about the Nucleo boards is that they appear, at the USB interface, as three different devices:  a storage disk with its file system, a serial port and a debugging interface. This is how it appears:

$ dmesg
...
[ 1209.124022] usb 3-2: new full-speed USB device number 3 using uhci_hcd
[ 1209.296729] usb 3-2: New USB device found, idVendor=0483, idProduct=374b
[ 1209.296734] usb 3-2: New USB device strings: Mfr=1, Product=2, SerialNumber=3
[ 1209.296738] usb 3-2: Product: STM32 STLink
[ 1209.296741] usb 3-2: Manufacturer: STMicroelectronics
[ 1209.296744] usb 3-2: SerialNumber: 066EFF534951775087044835
[ 1210.582585] usb-storage 3-2:1.1: USB Mass Storage device detected
[ 1210.582770] scsi10 : usb-storage 3-2:1.1
[ 1210.582887] usbcore: registered new interface driver usb-storage
[ 1210.604091] cdc_acm 3-2:1.2: This device cannot do calls on its own. It is not a modem.
[ 1210.604113] cdc_acm 3-2:1.2: ttyACM0: USB ACM device
[ 1210.605778] usbcore: registered new interface driver cdc_acm
[ 1210.605781] cdc_acm: USB Abstract Control Model driver for USB modems and ISDN adapters
[ 1211.584633] scsi 10:0:0:0: Direct-Access MBED microcontroller 1.0 PQ: 0 ANSI: 2
[ 1211.585468] sd 10:0:0:0: Attached scsi generic sg3 type 0
[ 1211.590616] sd 10:0:0:0: [sdc] 304 512-byte logical blocks: (155 kB/152 KiB)
[ 1211.593610] sd 10:0:0:0: [sdc] Write Protect is off
[ 1211.593615] sd 10:0:0:0: [sdc] Mode Sense: 03 00 00 00
[ 1211.596613] sd 10:0:0:0: [sdc] No Caching mode page found
[ 1211.596618] sd 10:0:0:0: [sdc] Assuming drive cache: write through
[ 1211.621623] sdc:
[ 1211.638608] sd 10:0:0:0: [sdc] Attached SCSI removable disk

$ lsusb
...
Bus 003 Device 006: ID 0483:374b STMicroelectronics 
...

The debugging interface doesn’t seem to appear, but the serial is created as “/dev/ttyACM0” and the disk as a SCSI adapter in “/dev/sdc“. In order to upload and flash code into the microcontroller it is sufficient to copy the binary file into the storage, and ST-Link will flash it and delete the file. It’s very simple and works out of the box in Linux, except for the fact that in my Debian testing computer it asked me for root permission before mounting it, but I solved this issue later…

The mbed website suggests to update the board with the latest firmware, but the downloads offer a Windows EXE updater and a Windows DLL as a driver. A quick Internet search didn’t provide solutions so I decided to skip the update hoping it will work anyway.

(Trying to) connect with OpenOCD 0.7.0

I wanted to see if I could connect to the STM32 with OpenOCD (like I did with Olimex STM32P), so I tried to see how the platform is supported.

At a first glance it seems that the OpenOCD that I have installed (0.7.0) already contains some configurations for ST-Link and STM32F1x, which looks like what I need. The scripts are usually installed in “/usr/share/openocd/scripts/” directory, which is also the directory from where OpenOCD searches for its configuration files.

I tried the following command, that specifies ST-Link as the interface, and a generic stm32f1x as the target, showing some debug information (level 3):

$ openocd -f interface/stlink-v2.cfg -f target/stm32f1x_stlink.cfg -d3

But OpenOCD did not find the board. By looking at ST-Link configuration file it’s clear that it expected Product ID 0×3748 but this board appears as 0x374b. To correct the PID to the one we saw earlier I ran:

$ openocd -f interface/stlink-v2.cfg -c "hla_vid_pid 0x0483 0x374b" -f target/stm32f1x_stlink.cfg -d3

But the configuration failed at “stlink_usb_open()“, and by a quick search it seems to fail because I did not have permission to open the device. Usually OpenOCD solves this issue by creating an udev rule file in “/lib/udev/rules.d/60-openocd-custom.rules” that gives the plugdev group the necessary permissions. I decided to create a new udev rule file called “/etc/udev/rules.d/60-openocd-custom.rules” with just the following content for ST-Link product:

ACTION!="add|change", GOTO="openocd_rules_end"
SUBSYSTEM!="usb|tty|hidraw", GOTO="openocd_rules_end"
ATTRS{idVendor}=="0483", ATTRS{idProduct}=="374b", MODE="664", GROUP="plugdev"
LABEL="openocd_rules_end"

But running the same command OpenOCD complained with the following message:

...
Debug: 164 7 stlink_usb.c:1233 stlink_usb_open(): stlink_usb_open
Debug: 165 7 stlink_usb.c:1251 stlink_usb_open(): transport: 1 vid: 0x0483 pid: 0x374b
Error: 166 10 stlink_usb.c:1279 stlink_usb_open(): read version failed
Debug: 167 10 hla_layout.c:49 hl_layout_open(): failed
Debug: 168 10 command.c:631 run_command(): Command failed with error code -4
User : 169 10 command.c:669 command_run_line(): in procedure 'transport'
Debug: 170 10 command.c:631 run_command(): Command failed with error code -4
User : 171 10 command.c:669 command_run_line(): in procedure 'init'

It turns out ST-Link/V2 and ST-Link/V2-1 are different in the USB device enumeration, and the OpenOCD 0.7.0 version I was using did not have support for ST-Link/V2-1.

Connecting with OpenOCD 0.8.0

So I upgraded to OpenOCD 0.8.0 that, in its changelog, explicitly mentions ST-Link/V2-1. In fact it works!

$ openocd -f interface/stlink-v2-1.cfg -f target/stm32f1x_stlink.cfg
Open On-Chip Debugger 0.8.0 (2014-10-20-22:02)
Licensed under GNU GPL v2
For bug reports, read

http://openocd.sourceforge.net/doc/doxygen/bugs.html

Info : This adapter doesn't support configurable speed
Info : STLINK v2 JTAG v23 API v2 SWIM v6 VID 0x0483 PID 0x374B
Info : using stlink api v2
Info : Target voltage: 3.264064
Info : stm32f1x.cpu: hardware has 6 breakpoints, 4 watchpoints

As cleanup, I removed my udev rule file because OpenOCD already installs a new rule for this adapter. It seems to me that another effect of adding this rule is that Nucleo USB disk storage can be mounted without root permissions.

GDB debugging

I wanted to see if I could debug the device, so I prepared this OpenOCD configuration file that I called “gdb-pipe.cfg“:

gdb_port pipe
log_output openocd.log

$_TARGETNAME configure -event gdb-detach {
 echo "Debugger detaching: resuming execution."
 resume
}

The script uses a functionality that creates a communication pipe for GDB and writes the output to a file instead of standard output. The “detach” configuration is useful because when GDB disconnects from the target I want the program to continue, and not to stay halted.

Then I prepared a GDB script “attach.gdb” that contains:

target remote | openocd -f interface/stlink-v2-1.cfg -f target/stm32f1x_stlink.cfg -f gdb-pipe.cfg
monitor halt
monitor gdb_sync
stepi

The script runs OpenOCD and communicates with it through a pipe, then synchronizes with the running target and stays halted. I then connected to the STM32 with the GDB from the GCC ARM Embedded toolchain. Here is an example of a debugging session:

$ arm-none-eabi-gdb --command=attach.gdb
GNU gdb (GNU Tools for ARM Embedded Processors) 7.6.0.20131129-cvs
Copyright (C) 2013 Free Software Foundation, Inc.
License GPLv3+: GNU GPL version 3 or later <http://gnu.org/licenses/gpl.html>
This is free software: you are free to change and redistribute it.
There is NO WARRANTY, to the extent permitted by law. Type "show copying"
and "show warranty" for details.
This GDB was configured as "--host=i686-linux-gnu --target=arm-none-eabi".
For bug reporting instructions, please see:
<http://www.gnu.org/software/gdb/bugs/>.
Open On-Chip Debugger 0.8.0 (2014-10-20-22:02)
Licensed under GNU GPL v2
For bug reports, read

http://openocd.sourceforge.net/doc/doxygen/bugs.html

0x00000000 in ?? ()
target state: halted
target halted due to debug-request, current mode: Thread 
xPSR: 0x81000000 pc: 0x0800288c msp: 0x20004ff0
stepi ignored. GDB will now fetch the register state from the target.

Program received signal SIGINT, Interrupt.
0x0800288c in ?? ()
(gdb) info registers 
r0 0x7a412 500754
r1 0x19b62cba 431369402
r2 0x40000824 1073743908
r3 0x2cbb 11451
r4 0xf4240 1000000
r5 0x19ae88a9 430868649
r6 0x20 32
r7 0x14 20
r8 0xdffd6fde -537038882
r9 0xbffbfeff -1074004225
r10 0x48c30094 1220739220
r11 0x88dd0a7c -1998779780
r12 0x40013400 1073820672
sp 0x20004ff0 0x20004ff0
lr 0x8002891 134228113
pc 0x800288c 0x800288c
xPSR 0x81000000 -2130706432
(gdb) continue
Continuing.
^C
Program received signal SIGINT, Interrupt.
0x08002890 in ?? ()
(gdb)

Flashing a binary program

I wanted to see if I could also flash the binary with OpenOCD; it’s not a crucial functionality since the binary can also be flashed by copying it into the disk storage, but it’s a good indication that thing works well. I took a binary file created and compiled with mbed with the following procedure:

  1. Add platform ST Nucleo F103RB to mbed compiler
  2. Create new program from template Blinky LED Hello World
  3. Compile it and it will download the binary program.

The downloaded binary is called “Nucleo_blink_led_NUCLEO_F103RB.bin“, so I prepared the following OpenOCD script called “flash_blink.cfg“:

init
reset init
halt
flash write_image erase Nucleo_blink_led_NUCLEO_F103RB.bin 0x08000000
shutdown

The script writes the binary at the beginning of the flash; the address is taken from the STM32F1X user manual. Then I flashed the device successfully with the following command:

$ openocd -f interface/stlink-v2-1.cfg -f target/stm32f1x_stlink.cfg -f flash_blink.cfg
Open On-Chip Debugger 0.8.0 (2014-10-20-22:02)
Licensed under GNU GPL v2
For bug reports, read

http://openocd.sourceforge.net/doc/doxygen/bugs.html

Info : This adapter doesn't support configurable speed
Info : STLINK v2 JTAG v23 API v2 SWIM v6 VID 0x0483 PID 0x374B
Info : using stlink api v2
Info : Target voltage: 3.267240
Info : stm32f1x.cpu: hardware has 6 breakpoints, 4 watchpoints
target state: halted
target halted due to debug-request, current mode: Thread 
xPSR: 0x01000000 pc: 0x08000108 msp: 0x20005000
auto erase enabled
Info : device id = 0x20036410
Info : flash size = 128kbytes
target state: halted
target halted due to breakpoint, current mode: Thread 
xPSR: 0x61000000 pc: 0x2000003a msp: 0x20005000
wrote 12288 bytes from file Nucleo_blink_led_NUCLEO_F103RB.bin in 0.957933s (12.527 KiB/s)
shutdown command invoked

After manually pressing the Reset button the user LED on the Nucleo board starts to blink as expected.

Conclusions

In conclusion, I found out that is pretty easy to use the new Nucleo boards (I assume the other boards are the same as mine) on Linux, with the exception of firmware upgrade . Next time I will try to write and compile some C program outside of mbed development environment and flash it on board, but I don’t foresee any problems since I already did something similar on an STM32 in a previous blog post.


Filed under: Embedded Tagged: arduino, ARM, cortex-m3, debian, debugging, gdb, jtag, linux, mbed, nucleo, openocd, st-link, stm32, stmicroelectronics, udev

libopencm3 for the license-sensitive Cortex-M developer

$
0
0

I was thinking of starting a new open source project that should run on STM32 boards, and I realized that it would need a lot of low level code that accesses many different peripherals. One of the first libraries that comes to mind, and I bet it’s the same for many Cortex-M developers, is ARM CMSIS.

ARM created CMSIS, which stands for Cortex Microcontroller Software Interface Standard, to give a specification on how to develop and distribute the code that accesses the hardware. Products like STM32 offer their own software packages that comply with CMSIS and that provide access to all the registers and functionalities of the chip. ST Microelectronics for example provides the STM32F10x standard peripheral library, and most recently the STM32CubeF1.

CMSIS license

Until recently, CMSIS was distributed with the restriction of an ARM EULA; in particular this agreement contains a clause that licenses the developer to:

(ii) use, copy, modify and sublicence the Source Code (in source or object code form) solely for the purpose of developing, having developed, manufacturing, having manufactured, offering to sell, selling, supplying or otherwise distributing products which comply with the Specification, provided that you preserve all copyright notices included in the Source Code.

This seems to force developers to comply with CMSIS specification when they create a program that uses the CMSIS library. Nowadays the situation changed, because CMSIS source code (not the specification) has been released by ARM under a much less restrictive BSD license. This license allows, for example, to use the CMSIS code in an open source project, with the sole requirement to retain the copyright notice, license conditions and disclaimer on those files. It also allows to use the code in a closed source project, provided that you document the usage and copyright of the CMSIS source code when you distribute the binary. In order to download from ARM the CMSIS package (that contains the source code) you have to register, so one might say that downloading isn’t “free” since you have to “pay” with your credentials and contact information. But the fact that the source code part of the package is under the BSD license means that anyone can legally redistribute that part under the same license, for example it is possible to get it freely from ARM-CMSIS-BSD GitHub repository without registering.

The CMSIS package created by ARM provides access to the Cortex-M functionality of a micro-controller, but any micro-controller has other peripherals and memories inside the chip; for this reason there are chip-specific libraries. STM32 standard peripheral library is distributed (can be downloaded freely) by ST Microelectronics with no license, and in order to obtain a license you have to contact ST. But this code has been superseded by their “Cube” initiative that offers the same (or updated) functionalities in a HAL (Hardware Abstraction Layer) library distributed under a BSD license, following the path that ARM took with CMSIS code.

Under the GNU terminology (backed by the Free Software Foundation) the BSD license is a non-copyleft license because it allows to redistribute the code under stricter restriction, for example by distributing it into a product in binary form you are practically disallowing the user from seeing the source code. It makes sense for ARM and ST to distribute their code under such license because the users of CMSIS code and STM32 libraries are sometimes companies that develop proprietary software products and sell them in binary form together with the hardware, and those companies are the ones who buy chips and create profit for them. On the other hand, the BSD license allows hobbyists, students, and so on, to use the code and the micro-controllers, thus raising the popularity, user base and software ecosystem of the hardware product. The FSF would say, in my interpretation of their philosophy, that such freedom isn’t desirable, and one of the reasons is because it allows to distribute open source code into binary code, and we can’t know (easily) if the original open source code has been modified or if it’s even there. A malicious individual could sell code without giving credit, or could potentially inject vulnerabilities in the devices we own. The FSF would suggest the GPL licenses instead.

libopencm3 license

heckert_gnu.smallIt’s possible to develop, independently from ARM or ST and their code, a low-level library to access Cortex-M and STM32 peripherals and release it under the GPL license, which forces anyone who develops a program with that code to use GPL when redistributing the program. So this library can only be used in open source projects. This was the intent of libopenstm32 (released under GPL3), intent which was not received completely well: GPL is “viral” and restrictive, in a certain sense, because it forces the developer to keep the code open source, redistribute also its modifications, and use the same license for all the code that links it.

On the basis of the practical effects of these restrictions, the FSF recommends the following:

If developers are already using an established alternative library released under a nonfree license or a lax pushover license, then we recommend using the GNU Lesser General Public License (LGPL).

Which is the case in point because CMSIS and STM32Cube libraries are released under a “lax” license such as the BSD one. Maybe for this reason the libopenstm32 project took a different turn: it was re-branded as libopencm3, with the aim to cover different micro-controllers and not only the STM32, and it was released under the “lesser” LGPL3. The “lesser” GPL licenses are particularly useful for software libraries, and allow the linking of the library into both closed and open source programs, provided that the library and its modifications are released under the LGPL, and also providing something quite peculiar of embedded development that needs some explaining:

The application of LGPL3 license comes quite natural for Linux shared (dynamic) libraries, which are distributed as files separate from the main program. But when we develop for micro-controllers, we (almost always) build a single binary that contains all the libraries, linked statically. The FSF explains in the GPL FAQs the discipline to adopt:

(1) If you statically link against an LGPL’d library, you must also provide your application in an object (not necessarily source) format, so that a user has the opportunity to modify the library and relink the application.

So if someone would use an LGPL3 library into its own closed source program, they must provide also a way for the user to redo the linking part. This might sometimes be a hassle (provide object archive, linker script and linker command; strip debug symbols; be aware of the toolchain) but it seems doable in common cases.

To conclude, a Cortex-M developer has currently many options if they want to use an existing low-level library to access peripherals. There are the CMSIS and STM32Cube libraries, which are released under BSD license so they can be used in any project and modified at will, and those modifications can end up closed in a binary and not shared back to the open source community. Then there’s the libopencm3 library, which is shared under the LGPL3 and so it could be used in any project, the modifications must be shared back if they are distributed, and the linking should be made possible even when used for closed source programs. They are both valid options, I hope this post will allow developers to make a more informed decision.

I am currently trying libopencm3, which seems quite rich and evolved to support many micro-controllers; I’m going to write something about it soon.


Filed under: Embedded Tagged: ARM, bsd, cmsis, copyleft, copyright, cortex-m3, fsf, gcc, gnu, lgpl3, libopencm3, libopenstm32, microcontrollers, open source, stm32

libopencm3 on STM32 Nucleo board

$
0
0
ST Nucleo-F103RB

ST Nucleo-F103RB

This article is part of a series about developing for STM32 micro-controllers on Linux.

A few days ago I talked about libopencm3, an open source library to access Cortex-M functionalities and peripherals of many micro-controllers, especially STM32 variants. I wanted to use this library to develop on a Nucleo board that I have in my hand, specifically the Nucleo-F103RB, which mounts an STM32F103RB.

Required tools

On my Linux (Debian testing) PC I managed to compile and run the software using:

When I installed the GCC toolchain I got from the download page the Linux installation tarball (gcc-arm-none-eabi-4_9-2015q1-20150306-linux.tar.bz2) and decompressed it in /opt/ as root:

# cd /opt/
# tar xjf &lt;download path&gt;/gcc-arm-none-eabi-4_9-2015q1-2015

then as user I added the bin directory to the PATH running the following commands, that can be also placed in “~/.bashrc” so that they are run before opening a terminal.

$ PATH="/opt/gcc-arm-none-eabi-4_9-2015q1-2015/bin/:${PATH}"
$ export PATH

OpenOCD, needed to connect with the JTAG debug port of the STM32, needs to be at least version 0.8.0 because it’s the version that adds support for STLink v2.1 that is present on the Nucleo board. On my Debian box I simply ran “aptitude install openocd” as root.

Setting up development with libopencm3

The libopencm3 project maintains also a repository of examples, that contains also the instructions on how to integrate the library into your own project. Taking inspiration from those example, I made an empty directory and then ran the following commands to download the current state of libopencm3 (as of 2014/04/19), compile it and get the common Makefiles to build with it:

$ git clone git://github.com/libopencm3/libopencm3.git
$ git reset --hard 7dbb93c78411b37bec64b5ca5be55076b0ab1b15
$ make -C libopencm3
$ wget https://raw.githubusercontent.com/libopencm3/libopencm3-examples/master/examples/Makefile.rules
$ wget https://raw.githubusercontent.com/libopencm3/libopencm3-examples/master/examples/stm32/f1/Makefile.include

Then I changed “Makefile.include” last line as: “include Makefile.rules“, since I am going to build my program in the same directory as these Makefiles.

Note that the “git reset” command will take you to the commit that I used; to retrieve the latest code afterwards, run “git pull“. Note also that doing “make -C directory” is similar to changing to that directory, running “make” there and changing back.

In my case libopencm3 doesn’t ship with a linker script for the STM32F103RB, so I had to write one. Fortunately the library already provides the complex parts of a linker script in a generic file, leaving to the developer just the description of the “MEMORY” part, so I wrote the following file and called it “stm32f103rb.ld“:

MEMORY
{
  rom (rx)  : ORIGIN = 0x08000000, LENGTH = 128K
  ram (rwx) : ORIGIN = 0x20000000, LENGTH = 20K
}

INCLUDE libopencm3_stm32f1.ld

The included linker script is present in the libopencm3 directory that we downloaded earlier.

Note that it’s possible to generate an HTML documentation of libopencm3 with doxygen by running the command “make -C libopencm3 html“.

Develop and run a simple blink program

The Nucleo board has a LED and I would like to make it blink. The information I need to do so are present in the STM32 Nucleo user manual and in the STM32F103RB reference manual. In the schematics the LED identified with LD2 is connected to PA5 pin of the STM32: it’s the GPIOA port, pin 5, that we should configure as an output in the code. From the STM32 manual we can get that the clock of the GPIOA port should be enabled first, through the Reset and Clock Control (RCC) peripheral.

libopencm3 offers some functionalities to access peripherals. The first way is to access registers directly, and since they are memory mapped it means writing and reading from memory addresses, conveniently defined as macros such as GPIOA_CRL (low part of configuration register) that can be used as 32-bit unsigned variables. The second way is to use convenience functions that allow to hide some complexity of the peripherals. Both these approaches are described in the STM32F1 page of libopencm3 documentation, the first one in the “defined constants and types” section, the other in the “libraries” section. In my example below I created a “blink.c” source file with the second approach, so using the function libraries, taking inspiration from the miniblink program in the examples:

#include <stdint.h>
#include <libopencm3/stm32/rcc.h>
#include <libopencm3/stm32/gpio.h>

static void delay_loop(int32_t loops)
{
 while(loops > 0)
 {
 asm("nop");
 loops--;
 }
}

int main(void)
{
 rcc_periph_clock_enable(RCC_GPIOA);
 gpio_set_mode(GPIOA, GPIO_MODE_OUTPUT_2_MHZ, GPIO_CNF_OUTPUT_PUSHPULL, GPIO5);
 while(1)
 {
 gpio_toggle(GPIOA, GPIO5);
 delay_loop(1000000);
 }
}

The program enables GPIOA clock, configures pin 5 as output, and loops with a delay to make the blinking visible.

In order to build the program, I created the following “Makefile“, where the BINARY variable also implicitly tells make to search for a file named “blink.c“.

BINARY = blink
OPENCM3_DIR = libopencm3
LDSCRIPT = stm32f103rb.ld
OOCD_INTERFACE = stlink-v2-1
OOCD_BOARD = st_nucleo_f103rb

include Makefile.include

Then it’s simply a matter of plugging the Nucleo board in the USB slot and run “make flash” to compile, create a binary and write it inside the STM32 embedded flash through the ST-Link adapter. I am pasting here the output of running the command with higher verbosity:

$ make V=1 flash
Using libopencm3 path to library
arm-none-eabi-gcc -Os -g -Wextra -Wshadow -Wimplicit-function-declaration -Wredundant-decls -Wmissing-prototypes -Wstrict-prototypes -fno-common -ffunction-sections -fdata-sections -MD -Wall -Wundef -Ilibopencm3/include -DSTM32F1 -mthumb -mcpu=cortex-m3 -msoft-float -mfix-cortex-m3-ldrd -o blink.o -c blink.c
arm-none-eabi-gcc --static -nostartfiles -Llibopencm3/lib -Tstm32f103rb.ld -Wl,-Map=blink.map -Wl,--gc-sections -mthumb -mcpu=cortex-m3 -msoft-float -mfix-cortex-m3-ldrd blink.o -lopencm3_stm32f1 -Wl,--start-group -lc -lgcc -lnosys -Wl,--end-group -o blink.elf
arm-none-eabi-objcopy -Oihex blink.elf blink.hex
  FLASH   blink.hex
openocd -f interface/stlink-v2-1.cfg \
	    -f board/st_nucleo_f103rb.cfg \
	    -c "init" -c "reset init" \
	    -c "flash write_image erase blink.hex" \
	    -c "reset" \
	    -c "shutdown"
Open On-Chip Debugger 0.8.0 (2014-10-20-22:02)
Licensed under GNU GPL v2
For bug reports, read
	http://openocd.sourceforge.net/doc/doxygen/bugs.html
Warn : Interface already configured, ignoring
Error: already specified hl_layout stlink
srst_only separate srst_nogate srst_open_drain connect_deassert_srst
Info : This adapter doesn't support configurable speed
Info : STLINK v2 JTAG v23 API v2 SWIM v6 VID 0x0483 PID 0x374B
Info : using stlink api v2
Info : Target voltage: 3.267240
Info : stm32f1x.cpu: hardware has 6 breakpoints, 4 watchpoints
target state: halted
target halted due to debug-request, current mode: Thread
xPSR: 0x01000000 pc: 0x08000220 msp: 0x20002000
auto erase enabled
Info : device id = 0x20036410
Info : flash size = 128kbytes
target state: halted
target halted due to breakpoint, current mode: Thread
xPSR: 0x61000000 pc: 0x2000003a msp: 0x20002000
wrote 1024 bytes from file blink.hex in 0.218966s (4.567 KiB/s)
shutdown command invoked

Note that there are some errors printed but it’s because OpenOCD is told to use stlink-v2-1 interface and then board st_nucleo_f103rb, but the board configuration file contains also the configuration of the same interface, so some settings are duplicated. Anyway the program is flashed, the board is reset and LED LD2 starts to blink.

With libopencm3 it is possible to develop software in the same way for other peripherals such as the Analog-Digital Converter (ADC), the USART serial communication, timers and so on. The convenience functions provide a platform to start using the peripheral, and then with the macros to access registers directly it is possible to develop very efficient programs both in terms of execution time and code size, without sacrificing readability. I like this library and the code style that has been applied consistently, I think it will become my library of choice for my next STM32 projects.


Filed under: Embedded Tagged: ARM, arm-none-eabi, blink, cmsis, cortex-m3, doxygen, gcc, git, gpio, led, libopencm3, linker script, makefile, nucleo, openocd, st-link, stm32, stmicroelectronics

Arduino Ethernet shield on STM32 Nucleo

$
0
0

I have a clone of the Arduino Ethernet shield R2, and I already hooked it up on an Arduino Uno, as explained in a previous post. But I also have an STM32 Nucleo-F103RB board, which is similar to Arduino with respect to many of its pins, so I wanted to try this shield with it.

The main problem with putting them together is that the Ethernet shield should be connected to the lower board through a special 6-pin connector called ICSP, but the Nucleo board doesn’t have it. I studied the schematics of the Arduino Ethernet shield R2, where it can be seen that the ICSP brings the SPI signals from the Arduino below (which is the SPI master) to the Wiznet W5100 chip on the shield (which is the SPI slave). From the Arduino Uno schematics we can confirm that the ICSP is connected to MISO, MOSI and SCK signal, that are also connected to the usual Arduino pins 11, 12 and 13. Unfortunately, on the Ethernet shields the pins 11, 12 and 13 are disconnected, so if the ICSP is not connected, the SPI communication can’t work. In contrast, the ICSP connects also the RESET, GND and +5V signals, but these signals also pass through the Arduino connectors, so they can work even without the ICSP connector.

Inside Nucleo board user manual there are the schematics of the Nucleo board. From those, we can follow the signals from pins 11, 12 and 13 of the Arduino connectors (here labeled D11, D12 and D13) to see that they are connected to the PA5, PA6 and PA7 pins of the STM32F103RB. From its Datasheet we can then confirm that these pins can be configured as SPI signals, specifically SPI1_SCK, SPI1_MISO and SPI1_MOSI.

"SPI single slave" by en:User:Cburnett - Own workThis vector image was created with Inkscape.. Licensed under CC BY-SA 3.0 via Wikimedia Commons - https://commons.wikimedia.org/wiki/File:SPI_single_slave.svg#/media/File:SPI_single_slave.svg

“SPI single slave” by en:User:Cburnett – Own workThis vector image was created with Inkscape. Licensed under CC BY-SA 3.0 via Wikimedia Commons

My idea is to use jumper wires to bring the SPI signals to the ICSP from the pins 11, 12 and 13 of the Arduino connector on the Ethernet shield. This will connect the SPI1 master pins from the STM32 through the Arduino connector, then through my jumper wires, then through the ICSP connector, finally to the SPI slave pins of the W5100 chip. ICSP pin numbering can be deduced by searching for a dot on one of the 6 pins, on the top side of the shield: that is the pin number 1. So I take three wires and connect:

  • MISO: pin 1 of the ICSP to pin 12 of the Arduino connector,
  • SCK: pin 3 of the ICSP to pin 13 of the Arduino connector,
  • MOSI: pin 4 of the ICSP to pin 11 of the Arduino connector.

The result is shown in the photo below.

Nucleo board wired with Ethernet shield.

Nucleo board wired with Ethernet shield.


Then, in order to see if the connection worked, I wrote a small program for the STM32 that communicates with the W5100 through SPI, to check that the chip internal resources can be accessed. I will explain what I did in a later post because there are many parts in play; if you are impatient, the code is here, on a GitHub repository that I use for these tests.


Filed under: Hardware Tagged: arduino, ethernet, internet of things, iot, jumper wires, nucleo, shield, spi, stm32, stmicroelectronics, w5100, wiznet

LimiFrog: matchbox-sized battery-powered sensor-filled dev platform, on Kickstarter

$
0
0

Disclosure: I am currently employed by STMicroelectronics. The product I’ll be talking about contains many ST chips and the creator was an ST employee himself. I’ll be writing my own personal opinions, you can judge if they are biased.

I received news about this Kickstarter: LimiFrog. It’s a small board advertised for developing and prototyping applications that needs sensors and connectivity. I think it’s remarkable because it’s very compact, promises to be energy efficient and has so many features to rival an Arduino plus something like four shields (battery, bluetooth, display, sensors).

LimiFrog

LimiFrog

Its full-featured version has:

  • An STM32L4 that contains:
    • ARM Cortex-M4 microcontroller with Floating Point Unit
    • 80MHz of CPU clock speed
    • 512KiB of embedded flash and 128KiB of RAM
    • Many peripheral controllers
  • An OLED display
  • A LiPo battery that can be recharged with USB
  • 8 Megabytes of non-volatile flash memory
  • A boatload of sensors: accel, gyro, pressure, ambient light, a mic, temperature, magnetometer, proximity.
  • Bluetooth 4.1 Low Energy
  • Connector for extensions like UART, SPI, A/D, …

The creators are developing code (it’s public on their GitHub repository) based on CMSIS and STM32 peripheral library. It contains the code to treat the 8MiB flash as a FAT-formatted disk, and a graphic library for the OLED display. They have plans to port micropython to the platform so that it can be programmed also in (a subset of) Python. It’s possible to upload code via USB and connect with a debugger via an SWD connector (needs an adapter, I bet something like an FTDI cable would work too).

The Kickstarter objective is to start production of a large batch of boards, so that the costs can be brought down and the final price can be competitive. The end date is at end of September.


Filed under: Hardware Tagged: ARM, bluetooth, cmsis, cortex-m4, internet of things, iot, kickstarter, limifrog, microcontroller, micropython, oled, sensors, stm32

Work in progress: POSIX socket library for W5100

$
0
0
Nucleo board wired with Ethernet shield.

Nucleo board wired with Ethernet shield.

In a previous post I connected a Nucleo board with an Ethernet shield, with the SPI wired between the STM32 and the Wiznet W5100 chip. I am now in the process of writing some C tests for it on a GitHub repository, and in particular a socket library that tries to conform to POSIX specifications. At this time the TCP connections are working, both in server mode and in client mode. Many functionalities and details are currently overlooked or not implemented, but the basics are there and the code is getting better little by little.

One of my goals is to put together a system that is able to perform secure connections such as with OpenSSL, as a baseline for security in the Internet of Things.


Filed under: Embedded Tagged: internet of things, iot, nucleo, openssl, spi, stm32, w5100, wiznet

Update on POSIX socket library for W5100: client and server for TCP or UDP

$
0
0
Nucleo board wired with Ethernet shield.

Nucleo board wired with Ethernet shield.

I am writing a library that implements POSIX sockets, also called Berkeley sockets, for my ST Nucleo+Ethernet shield setup. The functionality that is currently in place, as for the source code on GitHub, allows for TCP client/server connections and UDP client/server communication using Wiznet W5100 chip resources. The interface is not complete, but what’s in place is taken as literally as I could from POSIX.1-2008 standard. One benefit of this approach is that I wrote a few tests for this library, and they compile and run both for my Nucleo board and for my Linux PC without changing a line of code, despite the fact that the first one works on top of my library and the second one works on Linux system calls (see the tests here). In order to do so I had to write also some code for generic file descriptors and standard I/O.

What works is the following:

  • Generic socket management: socket() and close() for socket creation and destruction
  • Generic socket communication: send()/sendto()/write() to transmit and recv()/recvfrom()/read() to receive using TCP and UDP sockets.
  • TCP client functions: connect() to initiate a connection with a server.
  • TCP server functions: bind()/listen()/accept() to manage server-side connections on a chosen port.
  • UDP client functions: connect() and recvfrom()/sendto() for connectionless communication.
  • UDP server: bind() and recvfrom()/sendto() for connectionless communication.
  • Miscellaneous: stdin, stdout and stderr are directed to the serial port seamlessly.

4 connections at the same time can be made with W5100 because of its internal resources. I am not familiar with the other components of the Wiznet family, but I suppose they are similar to the W5100 so I hope that what I am doing may be ported easily to other chips.

The next POSIX functionalities that I want to implement are non-blocking option and select()/poll() functions. Then I could move on to the following:

Another functionality that I would like to add to my platform is to use the SD-card slot of the Ethernet shield to access a file system. I could use ChaN FatFs, encapsulating its interface so that I can access the file system with the standard C I/O functions such as fopen() and fprintf().


Filed under: Embedded Tagged: arduino, berkeley, dhcp, dns, ethernet shield, internet of things, iot, linux, nucleo, openssl, posix, socket, spi, ssl, stdio, stm32, tcp, tcp/ip, tls, udp, w5100, wiznet

DHCP client on STM32 Nucleo and W5100

$
0
0

I am still working on a device consisting of STM32 Nucleo F103RB with a W5100 Ethernet shield. This time I included a DHCP client, so that when the device is attached to a network, it will ask for an IP address instead of being statically allocated.

nucleo_w5100

STM32 Nucleo connected with Ethernet shield.

The DHCP protocol follows the RFC 2131 and RFC 2132, and I implemented the library following these specifications. The library depends on a generic POSIX interface that I implemented recently, with no direct dependence to the hardware below, but I also created a wrapper for W5100 that can be used to automatically configure the IP address into the Ethernet interface when the DHCP binds the device to an address.

I fired Wireshark on a computer that is connected to the same router, and by sniffing the packets I can look at the interactions between the Nucleo and the router, shown in the figure below. At first there’s a Discover-Offer transaction between client and server that indicates an available IP address, and then a Request-Ack transaction to bind that address to the client. The transactions are also used to retrieve the gateway, subnet and DNS servers that the client can configure.

Screenshot_2015-12-07_20-43-54

Wireshark capture of DHCP address allocation.

The address is bound with a lease time, so when the lease is expiring it needs to be renewed, so the library needs to be called again after some time to renew the lease. In order to manage time, I also implemented a rudimentary implementation of POSIX time functions, that use Cortex-M SysTick interrupt to count the passage of time.

If you want to try this library, you need:

  • a Nucleo F103RB + W5100 Ethernet shield,
  • GCC ARM Embedded toolchain to compile the program,
  • OpenOCD to write the program into STM32 embedded flash,
  • a router that offers DHCP services.

Then you can:

  1. clone my GitHub repository,
  2. change directory to `tests/dhcp_allocate`,
  3. run `make flash` to compile and upload program,
  4. wait for the Ethernet shield LEDs to indicate that the link is up,
  5. connect a terminal to the Nucleo serial port with baud rate 57600, for example with `minicom -b 57600 -D /dev/ttyACM0`,
  6. press any key in the terminal to start DHCP address allocation.

Filed under: Embedded Tagged: arduino, ARM, berkeley, cortex-m3, dhcp, linux, nucleo, open source, posix, rfc2131, rfc2132, stm32, stmicroelectronics, systick, tcp/ip, udp, w5100, wiznet

DNS client on STM32 Nucleo and W5100

$
0
0

I am still working on a device consisting of STM32 Nucleo F103RB with a W5100 Ethernet shield. This time I included a DNS client, so that the device can connect to a server by knowing its name. The name resolving can be invoked by using the POSIX functions getaddrinfo and gethostbyname.

nucleo_w5100

STM32 Nucleo connected with Ethernet shield.

DNS queries can have different strategies; the details are specified in RFC1034 and RFC1035 The only strategy that I implemented at the moment is the recursive query, where we try to delegate to the DNS server the burden of finding and contacting the authoritative servers. This is done by setting the RD flag (Recursion Desired) in the message header. Many DNS servers like Google 8.8.8.8 oblige to these requests.

The code is present on my GitHub repository, and the simplest example on how to use the getaddrinfo function is the following:

#include <stdio.h>
#include <sys/socket.h>
#include <arpa/inet.h>
#include <netdb.h>
#include <netinet/in.h>

int main()
{
  struct addrinfo *ai;
  struct addrinfo *ai_iter;
  struct addrinfo hints;
  const char *name;
  int res;

  hints.ai_flags = 0;
  hints.ai_family = AF_INET;
  hints.ai_socktype = SOCK_STREAM;
  hints.ai_protocol = 0;
  name = "www.facebook.com";

  res = getaddrinfo(name, NULL, &hints, &ai);
  if (res != 0)
  {
    if (res == EAI_SYSTEM)
    {
      perror("getaddrinfo");
    }
    else
    {
      fprintf(stderr, "error: getaddrinfo: %d\n", res);
    }
    return 1;
  }
  for (ai_iter = ai; ai_iter != NULL; ai_iter = ai_iter->ai_next)
  {
    struct sockaddr_in *addr;

    addr = (struct sockaddr_in *)ai_iter->ai_addr;

    printf("%s: %s\n",
            ai_iter->ai_canonname,
            inet_ntoa(addr->sin_addr));
  }

  freeaddrinfo(ai);
  return 0;
}

One nice thing of implementing functions as specified by POSIX is that this code now works both on my Linux desktop as well as on my Nucleo. Moreover, the implementation uses Berkeley (POSIX) sockets, so I even verified that my implementation of getaddrinfo can be compiled for Linux, and it works in the same way.

The gethostbyname function has been removed from POSIX.1-2008, but I implemented it anyway because libraries such as libcurl use it.

See also the previous posts:


Filed under: Embedded Tagged: arduino, ARM, berkeley, cortex-m3, dns, getaddrinfo, gethostbyname, github, linux, nucleo, open source, posix, rfc1034, rfc1035, stm32, stmicroelectronics, udp, w5100, wiznet

STM32 NUCLEO-F103RB has low resources for TLS 1.2

$
0
0

It’s been months since I started playing with a STM32 Nucleo + Ethernet shield. One of the objectives that I chase is to build a device for the Internet of Things that implement reasonably secure communications. In an effort to avoid reinventing the wheel (or at least to not reinvent too many wheels) I wanted to see if I could use HTTPS. HTTPS is a secure protocol that is based on TLS, and I specifically tried to integrate in my setup TLS 1.2, which is specified by RFC 5246.

One challenge is to fit the functionality into the STM32F103RB, that has 128KiB of Flash and 32KiB of RAM. The clock speed should not be a problem, I’m not aiming for performance but for functionality. For starting I simply want to create an HTTPS connection to a website, and send an HTTP GET request to retrieve a web page. Note that TLS specifications say that the only mandatory cipher suite is TLS_RSA_WITH_AES_128_CBC_SHA , so I need the program to implement just this.

I am working on a library that implements many POSIX-compliant functionalities, especially TCP and UDP network sockets (the source code is in GitHub nucleo_tests repository). The hope is that existing open source projects implementing TLS are able to compile using these basic functionalities. There are some projects that target small devices, and between those candidates I chose to try WolfSSL and mbed TLS.

I downloaded wolfssl 3.7.0 and tried to compile it with GCC ARM Embedded toolchain and my POSIX header. It just needed a small patch on some OS-dependant code, because I don’t have a real OS but a bare metal library that implements some OS functionality. Then I configured it disabling all I could, reducing the footprint because I needed to stay below the 128KiB of flash that the STM32 contains. I also avoided verifying the site certificates. Unfortunately the resulting program needs still too much RAM to run, in fact when I tried to run the program it crashed on a malloc. From “objdump -h” I notice that it needs 105KiB of flash, 2.5KiB of statically allocated RAM, and evidently needs too much dynamically allocated RAM. I tried to compile wolfssl and the test program on Linux, and the page was successfully retrieved.

mbed TLS has a similar story. I got mbedtls 2.2.0 source code, configured with minimal functionalities and compiled it, also following suggestions from their notes to “Reduce mbed TLS memory and storage footprint“. Unfortunately the program still needs 84KiB of Flash, 2.5KiB of statically allocated RAM, and more than 32KiB of dynamically allocated RAM. From their pages they made me notice that TLS actually requires 16KiB to contain a single fragment, and mbed TLS allocates two buffers, one for outgoing and one for incoming fragments, that are slightly bigger than 16KiB because of some protocol overhead. mbed TLS contains a configuration that allows to reduce this buffer’s dimension, but unfortunately it doesn’t seem to work when retrieving web pages through HTTPS, my interpretation is that the website doesn’t have to implement the functionality that negotiates the maximum fragment size.

I also tried to take OpenSSL 1.0.2e source and compile it, but my impression is that my POSIX library doesn’t have enough functionality yet.

I want to point out that these are the results I managed to obtain in my spare time with my knowledge and abilities, it is entirely possible that these memory requirements can be optimized more. This post is not meant as judgement on the bloat of some open source libraries or on the tiny resources of some hardware. I just explored the possibility that my Nucleo could run some open source TLS implementations, and the result is that I’m not able to run them.

My conclusion is that in order to run an application on TLS, for example an HTTPS client, I need at least 64KiB of RAM and around 256KiB of flash because half of them are occupied by the secure protocol stack. For example the NUCLEO-L476RG, that mounts an STM32 with 1MiB of flash and 128KiB of RAM, and contains also a true random number generator that is useful in order to add entropy to the security procedures.

See also:


Filed under: Embedded Tagged: ARM, arm-none-eabi-gcc, ethernet shield, https, internet of things, iot, linux, mbed, nucleo, openssl, stm32, stmicroelectronics, tcp, tcp/ip, tls, w5100, wiznet, wolfssl

HTTPS client on STM32 Nucleo-F411RE

$
0
0
Nucleo board wired with Ethernet shield.

Nucleo board wired with Ethernet shield.

One of my goal of the past months was to use an STM32 Nucleo board to get a webpage through HTTPS, using an Ethernet shield for TCP/IP stack. I was close last time, but I discovered that my Nucleo-F103RB did not have enough RAM. Now I have my hands on a Nucleo-F411RE that has 128KiB of RAM and 512KiB of Flash, and I was finally able to do it.

The hardware is composed of:

  • Nucleo-F411RE
    • STM32F411RE microcontroller
    • SPI master to communicate with other chips
    • USART serial port with STLink USB connection for standard I/O
    • JTAG with STLink USB connection to flash program
  • Ethernet shield
    • Wiznet W5100 that implements the TCP/IP and UDP/IP stacks.
    • SPI connection to the board below.

The software that I uploaded on board is composed of:

  • Low-level drivers provided by libopencm3
  • W5100 SPI driver to expose the chip registers and memories.
  • Socket API: POSIX socket library developed by me on top of W5100 functionality.
  • USART minimal driver to write/read from serial port through the STLink USB connection on the Nucleo.
  • DNS: I developed a minimal implementation of getaddrinfo() to retrieve the IP address of a website from its name.
  • TLS: I used mbedTLS 2.2.0 for the Transport Layer Security 1.2
  • The certificate of the CA, that is embedded statically as a binary blob into the program (I used Chrome to download it beforehand).
  • The application is simply an HTTP GET request.

The tools I used to build the software are:

  • GCC ARM Embedded toolchain (version 4.9 2015q1) to compile and link the code,
  • OpenOCD (version 0.9.0) to write the software image into the STM32 embedded flash,
  • Chrome to download the CA certificate,
  • minicom to connect with the serial port
  • All on my Debian (Stretch) Linux box

To build and run:

  1. git checkout my nucleo_tests repo (now at commit eb2cc1942618f745286028c3cc591012b92d56bc).
  2. Go in libopencm3 directory and run “make” to compile the low-level drivers.
  3. Download mbedTLS 2.2.0 and unpack it in nucleo_tests directory.
  4. Open “nucleo_tests/tests/test.mk“, comment the stm32f103rb line and uncomment the stm32f411re line.
  5. Go in “nucleo_tests/tests/mbedtls” directory and run “make” to build both the mbedTLS library and the application.
  6. Connect the Nucleo board + Ethernet shield to the PC with USB, and connect the Ethernet cable.
  7. In another terminal run “minicom -b 57600 -D /dev/ttyACM0” to connect to the serial port.
  8. Run “make flash” to write the program into the STM32 embedded flash (uses openocd program)
  9. Wait for the Link LED on the Ethernet shield to turn on.
  10. Go in the minicom terminal, and you should see a prompt; press a key to continue.
  11. The terminal should print the page that has been retrieved through HTTPS.

This is the output I get from the serial port:

Press any key to continue...
Certificate:
cert. version     : 3
serial number     : 02:0B:70:F4:68:67:1E:47:13:96:63:3D:99:2C:E5:CD
issuer name       : C=US, O=DigiCert Inc, CN=DigiCert SHA2 Secure Server CA
subject name      : C=US, ST=Cali
HTTP/1.1 200 OK
Server: nginx
Date: Thu, 04 Feb 2016 20:41:12 GMT
Content-Type: text/html; charset=UTF-8
Transfer-Encoding: chunked
Connection: keep-alive
Last-Modified: Mon, 09 Nov 2015 23:59:43 GMT
ETag: "687f8a-bd-52424631079c0"
Cache-Control: max-age=1209600
Expires: Wed, 10 Feb 2016 15:34:38 GMT
Vary: Accept-Encoding
X-Varnish: 324309826 304737767
Age: 709594
Via: 1.1 varnish
Strict-Transport-Security: max-age=31536000; includeSubdomains
X-Content-Type-Options: nosniff
X-Frame-Options: SAMEORIGIN

bd
<html>
    <head>
        <title>Site Under Maintenance</title>
    </head>
    <body>


<h1>This site is currently under maintenance. Please try back later.</h1>


    </body>
</html>

0

To conclude, this proof of concept shows a very small platform that can be used to build IoT applications with a layer of security. Instead of having an application processor running Linux, we have a microcontroller running at a frequency as low as 16MHz, the base software is around 90KiB of code running in flash, and needs around 50KiB of RAM, between static and dynamic memory. We are using a security layer that doesn’t invent anything new: it’s an implementation of the widely used TLS.


Filed under: Embedded Tagged: ARM, arm-none-eabi-gcc, certificate, ethernet shield, https, internet of things, iot, jtag, linux, mbed, minicom, nucleo, nucleo-f411re, openocd, openssl, spi, stm32, stm32f4, stm32f411re, stmicroelectronics, tcp, tcp/ip, tls, w5100, wiznet

Simple time synchronization for the Internet of Things

$
0
0

While adding HTTPS capNetwork-time-iconabilities to my STM32 Nucleo board, I needed to solve the problem of current time. This is because TLS needs to check certificate expiration date, so we need a sufficiently accurate estimation of time. So I tried to understand what could I do to ask a network server about the time. I discovered a couple of protocols that are useful for small devices because they need only basic resources.

Time Protocol

The RFC 868 describes the “Time Protocol“, which is a very old but deadly simple way to get the time from a server that implements this service. With this protocol a device is able to retrieve a 32-bit unsigned value indicating the number of seconds that have passed since the 1st of January 1900.

There are two ways to connect to the service: TCP or UDP. With TCP the device connects to port 37 and the server immediately sends back to the device the 32-bit value in 4 bytes (in network byte order); the device can now close the connection. With UDP, the device sends a dummy UDP datagram to port 37 of the server, containing 0 or more bytes whose content is ignored by the server; when the server receives a packet, it replies with the 32-bit value as before.

The precision of this time synchronization can’t be less than a second, moreover the time that passes between the sending and the receiving of the packet may vary. Anyway if we simply want the approximate time of the day, it’s good enough.

The implementation that I used in my Nucleo board is here in rfc868_time.c.

Simple Network Time Protocol

Many people are familiar with NTP, which is the protocol that our PCs use to synchronize the time with time servers around the globe. Its specifications are detailed in RFC 5905, and the precision that can be reached is very high.

But a simpler variant exists, aptly named SNTP and described in RFC 4330. An implementation of this protocol is able to retrieve from a server the timestamp containing the number of seconds from 1st of January 1900 and a fraction of second. A whole timestamp occupies 64 bits, and its value is more precise that what can be achieved by the Time Protocol, especially when the device performs some estimation of packet travel time and clock offset, using the timestamps present in the exchanged packets. The interaction also in this case is simple: it’s about sending a 36-byte UDP packet and receiving a similar packet, whose fields contains the timestamps that are used to synchronize the device clock with the server clock.

The implementation that I used in my Nucleo board is here in sntp.c.

There’s a list of NIST servers that implement the common time protocols here: NIST Internet Time Servers. It is advised to resolve time.nist.gov so that the client points to the nearest non-busy server.


Filed under: Embedded Tagged: ethernet, internet of things, iot, nist, ntp, nucleo, RFC4330, RFC5905, RFC868, sntp, stm32, tcp, tcp/ip, time protocol, udp
Viewing all 21 articles
Browse latest View live